8 fun chemistry experiments for kids
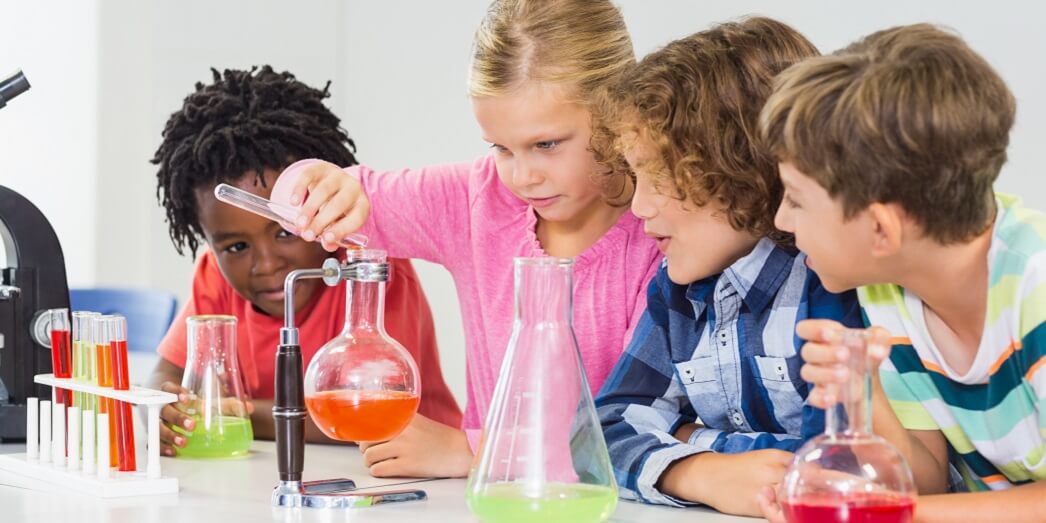
Arousing a child’s interest in science is not as complicated as it feels. Chemical experiments often do not require any special devices or reagents, while they are very visual and effective.
If you allow your child to experiment independently, you can be sure that he or she will remember this process for a long time. However, you should remember the following point: the child needs to be explained that what he or she saw is not a miracle but the result of chemical reaction. Among other things, adults should still observe the actions of children for safety purposes.
1. Volcano
To impress a child, you can add ordinary vinegar to baking soda. Pour more soda (about two tablespoons) into a small bowl and put vinegar on it. You can pour directly from the bottle.
Soda and acetic acid will react with the release of gas, and therefore the contents will begin to boil and foam right in front of your eyes. When conducting this chemical reaction, you should be careful not to lean close to the reagents.
You may improve the experiment and prepare a small theatrical performance for the child. Make a plasticine cone with a hole (volcano) and fix it on the bottom of the vessel. During the reaction of acetic acid and soda, a miracle will happen: the foam will begin to splash out like a real volcano!
2. Slime
To make the slime, you will need PVA glue, starch, three cups, a mixing container, food dye of the desired color.
We dilute the starch in water and measure out the same amount of glue, liquid starch, and water. It turned out three glasses with different substances. Pour water into a container and add PVA and mix thoroughly. Now, gradually add the dye to the mixture. After each serving, mix thoroughly. And so on, until you choose the color to your taste. You can even mix several dyes to get interesting shades.
The classic slime has a light green color. After the color is selected, add the liquid starch. It is important not to waste time and thoroughly stir the mixture until smooth until it thickens.
3. Edible sugar glass
Edible sugar glass is one of the variants of the comic performance. With its help, it’s easy to play with friends. With a certain skill, you can make quite plausible-looking objects from edible glass, for example, plates. If sugar is poured into pre-prepared molds, then you can make some toys, for example, soldiers, jewelry items, and much more. In general, the range of applications of sugar glass is limited almost only by your imagination. Molten and then frozen sugar is difficult to distinguish from the glass at first glance because both substances have a crystalline structure.
To make edible glass, you need to take a cup of sugar. We will also demand a frying pan, a baking sheet, a parchment for pastries, and a little butter. The parchment is greased with oil and located in a cold place. Meanwhile, warm up the sugar on low heat, mixing continually. After a while, the sugar will thicken and turn into a viscous mass.
If you add a little food coloring at this stage, then the edible glass will come out colored. Now it’s time to take the parchment out of the refrigerator, spread it out on a baking sheet, and carefully pour the melted sugar on it. After the mass has cooled, it will harden and turn into a glass-like substance. This is the edible sugar glass.
4. The shining liquid
There is the following myth. The shining liquid is still drinking water. Many people are seriously convinced that this type of liquid can be drunk. You don’t need to follow the example of those who will try to prove this information on their own. While the reaction is going on, compounds of chemical elements can significantly predetermine the deterioration of your health status.
In addition to the above, the shining liquid can be made with the help of a particular drink. We will need Mountain Dew lemonade. Also, you will need to take the bicarb, peroxide, which can be easily acquired in absolutely any drugstore. Thus, you should keep some of the drinks in the vessel. Then append sodium hydroxide to the drinking on the tip of a teaspoonful and add three teaspoons with peroxide. The bottle is closed and shaken well. Of course, there are no guarantees and no certainty that the right reaction will occur.
However, you should pay attention that there are ways to make a shining liquid. Using this option, the probability of obtaining the sought result will increase. However, if the fluid doesn’t illuminate, you should think about how correct the ingredients you used.
This method of producing a shining liquid is made on the basis of luminol.
For the recipe, you need a few grams of luminol, one hundred milliliters of water, three grams of copper sulfate, eighty milliliters of peroxide, ten milliliters of soda. You need to add peroxide to our liquid and three grams of copper sulfate. Finally, you should put soda in it. You should not apply the plates from which you eat.
5. Malachite egg
The following experiment is not super complicated. You will need calcium carbonate and copper sulfate. The result should be quite interesting: an egg with malachite color. The experience is quite simple but requires patience. The final result of the experiment you will be able to see only in a month, but you will like it!
It is worth paying attention to the fact that the experiment does not require any special reagents. Our experiment will require an ordinary egg, a glass jar, clay, copper vitriol (dry), gauntlets, and, finally, water.
To begin with, we should remove everything that is inside the egg itself. To perform this action, you will need to make two gaps on contrary parts. Now we put a small piece of clay inside the egg to increase the weight. Clay is not required for the chemical reaction itself.
Append 0.5 liters of water, then append a tablespoon of copper and mix it carefully and continually. The next step is to diligently put the eggshell in the can. That’s it! For today, the experience is over. At this moment, you should expect our long-awaited but awesome outcome!
However, do not worry. Some actions in the chemical reaction can already be observed before the end of the term. At first, we will see that gas bubbles will start to be produced from the eggshell. After a week, the eggshell will gradually change its color shade. After a period of one month, we will finally be able to enjoy the view of the egg with an amazing malachite hue!
6. Luminous flower
Now we will share three ways to make a real glowing flower. We will need a blacklight lamp, aka wood lamp, aka ultraviolet light lamp. These are sold in almost all electrical goods stores and costs as usual energy-saving. The bases of the blacklight lamps are available for any lamps.
Method № 1
We will need a text highlighter. Make sure that the trace of it glows under the blacklight lamp. Cut the marker pen and pull out the fibers with the ink. Squeeze the ink into a container with a small amount of water. Put the bloom there. Wait for a while until your chosen floret absorbs the fluorescent dye. When the ink permeates the flower, its petals will glow under the blacklight.
Method № 2
Spill a tonic, such as Schweppes, into a glass. Cut off the tip of the bloom stem and drop it into a glass. Wait a few hours until the quinine tonic penetrates the flower petals. Turn on the blacklight and enjoy your flower.
Tips for creating a glowing bloom:
- It is better to use flowers with white or slightly colored petals because they are colored much better.
- Use fresh, wholesome flowers. Blooms that are almost dead will not consume water and will not shine.
- Some flowers repaint better than the others. Cloves and chamomiles repaint better than roses.
7. Growing crystals
To grow crystals at home, make a saturated solution of salt or other reagents. Hang a small crystal in it, and it will gradually begin to grow grains from all sides.
Growing crystals is an interesting and informative activity for a child. It is quite safe, and it is easy to perform even for elementary school students under the supervision of their parents. The experience does not require a laboratory. It can be carried out at home.
Good raw material:
- Salt. The most affordable way is to make a crystal from table salt. You can take the sea one.
- Sugar. As a bonus, you will get a sweet tea, which will especially please the children.
- Double salts. This is an inexpensive material and is freely sold in pharmacies, as it is a means to stop bleeding.
- Copper vitriol. It forms stones of expressive blue color. It can be purchased in chemical and agricultural stores. It looks like a deep blue powder. Greenish and with lumpy lumps, it is better not to take it-this shows that it is damp and has too many impurities. Growing a crystal from such a material would be difficult.
- Sol Mora. It is a white or light blue powder. Pale green crystals grow out of it. It is sold in chemical reagent stores.
- Ammonium nitrate. It produces long and flat colorless crystals. It is sold in a fertilizer store called “ammonium nitrate”.
- Silver nitrate.
Instructions for creating a stone: the principle of crystal formation is the complete dissolution of the reagent in water and its subsequent precipitation. The slower the process is, the more regular the shape of the stone is obtained.
List of things needed for the experiment:
- The substance from which the stone is planned to be made.
- Warm water, preferably distilled, but not necessarily.
- Two glass or plastic containers. Glasses or jars will do if you want to create a large crystal. They should be transparent so that you can monitor the process.
- A spoon for stirring the solution.
- A glass or plastic funnel filled with cotton wool or filter paper.
- A thread or wire for hanging the seed grain. So, we need a copper wire because it can be simply removed. Besides, it has a smooth surface, so the crystals will not randomly grow along its length but will concentrate around the seed.
- Stick for fixing the thread on the container. You can take a pencil. But it is better to use an ice cream stick because it is flat and will not roll down, as can be seen in the photo.
- A circle of paper slightly larger than the neck of the jar.
- Gloves, apron.
When experimenting, take dishes that are not used for eating and cooking unless you’re going to grow a solo crystal (or sugar crystal).
8. Egg in a bottle
Egg in a vial is an experience that is interesting for kids and adults. This is a method to distract kids from modern gadgets and interest them in applied sciences.
For this test, you will need a glass vessel, a large egg, matches, paper.
Explanation: it is necessary to take a glass vessel. Other materials are absolutely not appropriate. The egg should be large: selected or 1 grade.
The process of experimenting: before putting the egg in the vessel, it must be cooked, cooled, and peeled from the shell. Crumple the paper, put it in a bottle, and set it on fire. When the paper burns to 50%, put an egg on the neck. After 2-3 seconds, the egg will be drawn into the bottle. Demonstration of experience always causes surprise and lively interest in children.
Explaining the experience to children
Parents do not have to puzzle over how to explain the experience with an egg in a bottle to their child — it’s all about physics. When heated, the air inside the vessel expands. As soon as the egg is on the neck, the air inside stops getting in. At this point, the paper finishes burning, and the air starts to cool. At the same time, it shrinks, which helps to push the egg into the bottle — it just tightens inside. A boiled egg is easier to put in a bottle than a raw egg. But you can also do such a project with children. Besides, you will need vinegar and a deep bowl.
Egg trick recipe
The egg (raw, in the shell) is placed in a bowl and filled with vinegar. You should wait 15 hours, carefully take it out and rinse it. Now you need to take a bottle, set fire to the paper inside it, put an egg on the neck. The egg is sucked into the bottle in a second! The fact is that the object soaked in vinegar is easily compressed (becomes plastic) and therefore easily falls inside the vessel. To get the egg inside the bottle, you will need a regular plastic bag: the bag is pushed inside so that the open part remains outside. The bag needs to be inflated. Then the vessel should be abruptly turned over, and the package should be pulled out with a quick movement. The egg will instantly pop out.
A simple experiment demonstrates the physical processes. So, it is easier for the child to clarify the laws of physics, tell them, and show clearly the secrets of such experiments.
The kids themselves are investigators, demonstrating an acute and astute interest in various research activities and experimenting. The experimenting affects the elaboration of mind, logical representing, creativeness and clearly demonstrates all the connections in nature.
Research provides the child with the opportunity to reply to the questions «how» and «why». The knowledge gained during the experiments is remembered for a long time.


new engaging articles